OK... now for some more Field sourced wibble
Tom's point about Schorm shows what seems to be a gross exaggeration compared to the few lost/missing items from what was only half a Support Group to begin with. Was Schorm including MGB2's abandoned/parked Kfzs as well as the listed British vehicles? MGB2 had had considerable losses according to Schorm so a lot of their vehicles could have been seen parked when Schorm got nearer MB.
Urmel if vehicles were to be found at a dump it would seem that they would be there as stored for issue. In terms of Mechili - half of 3rd Ind Mot Bde got out along with the Australian A/Tk Batteries and 'M' Battery 3rd RHA and nearly half of the 2nd Armd Div HQ units. Some 2000 troops did not so that must have left a lot of lorries of one sort or another even though some of them had been shot up from the two escape attempts. Some of those who surrendered like Major Cracroft & Captain Constant & Corporal Facer all got out separately in trucks during the surrender.
Mark Msus would have been destroyed as much as Hore-Ruthven and the French felt they needed to judging from HR's statement but at least those that came along used up the remaining/missed fuel. I am surprised any was missed. Brigadier Latham states the KDG took 3000 gallons (not the 5000 I mentioned before) and the KDG also refer to taking 250 gallons but perhaps the lesser amount was taken by a passing troop and the 3000 gallons by their Echelons - I don't know. Frankly I don't know why you trust and like Cabinet stuff - but everyone has a kink.
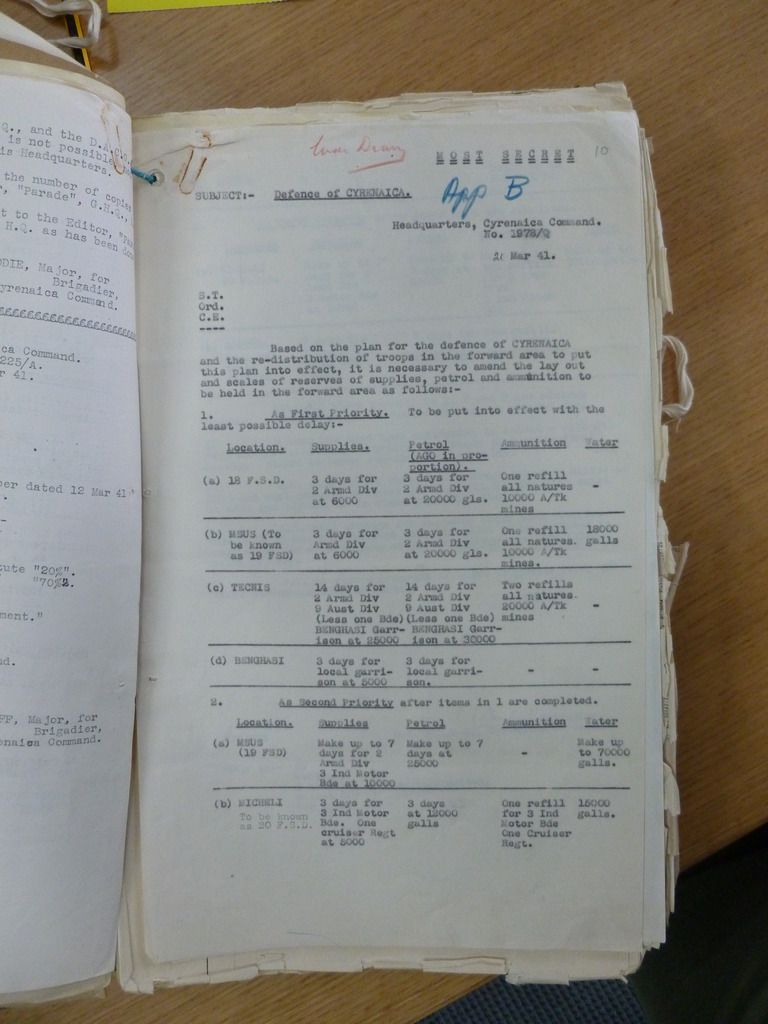
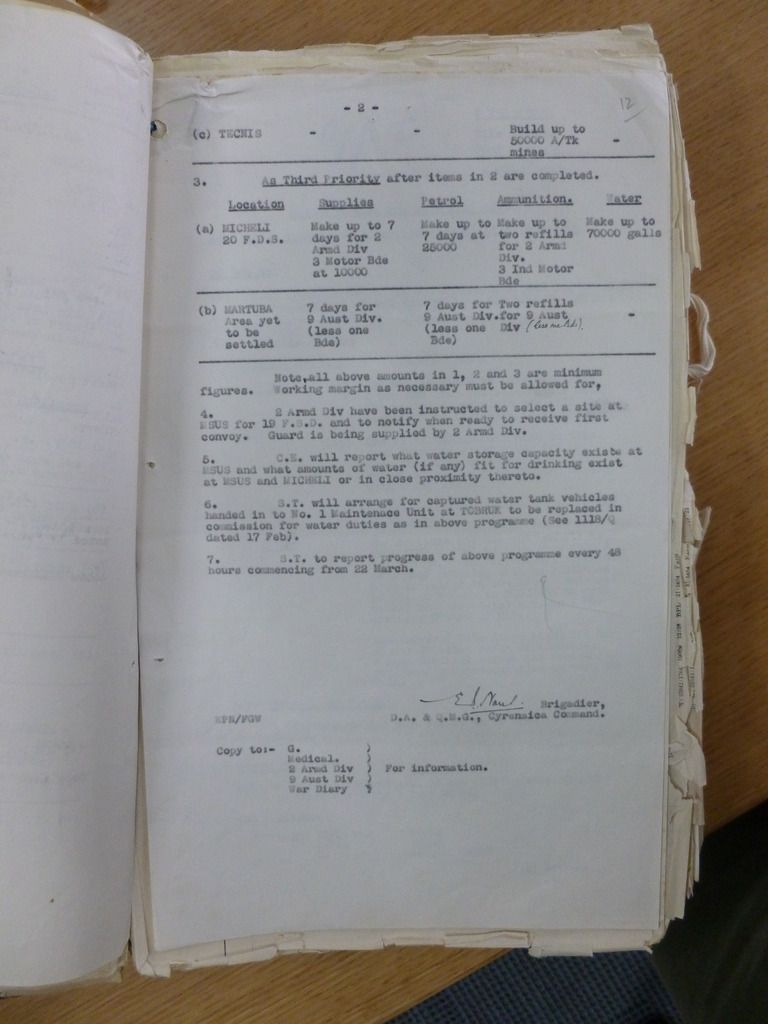
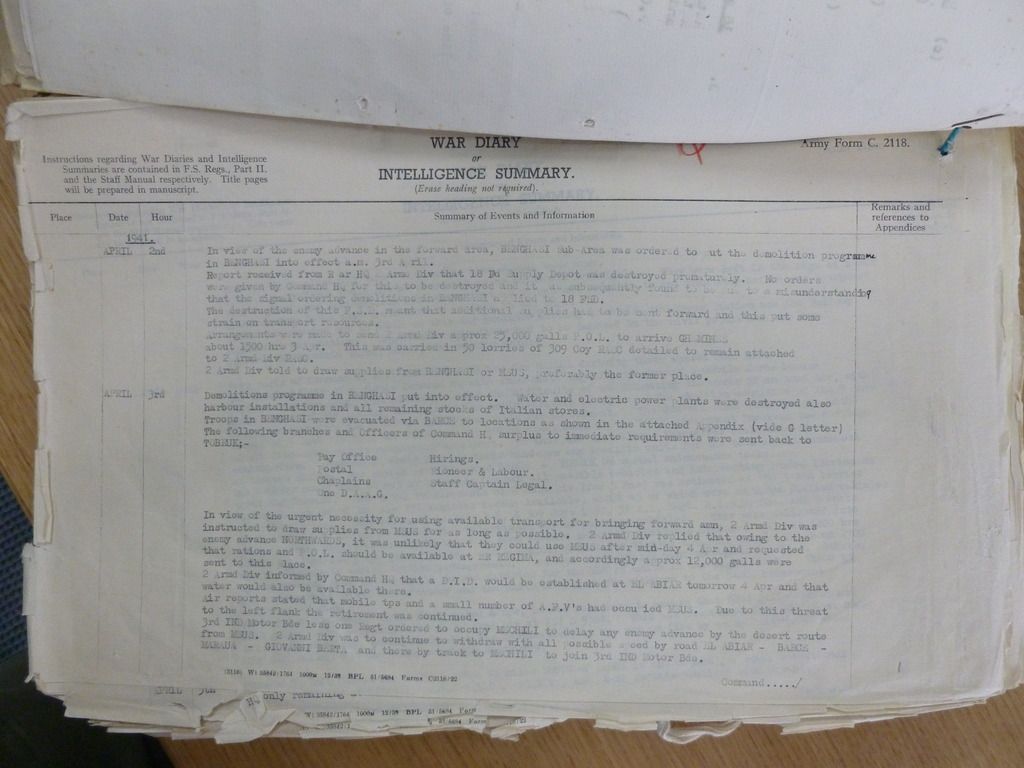
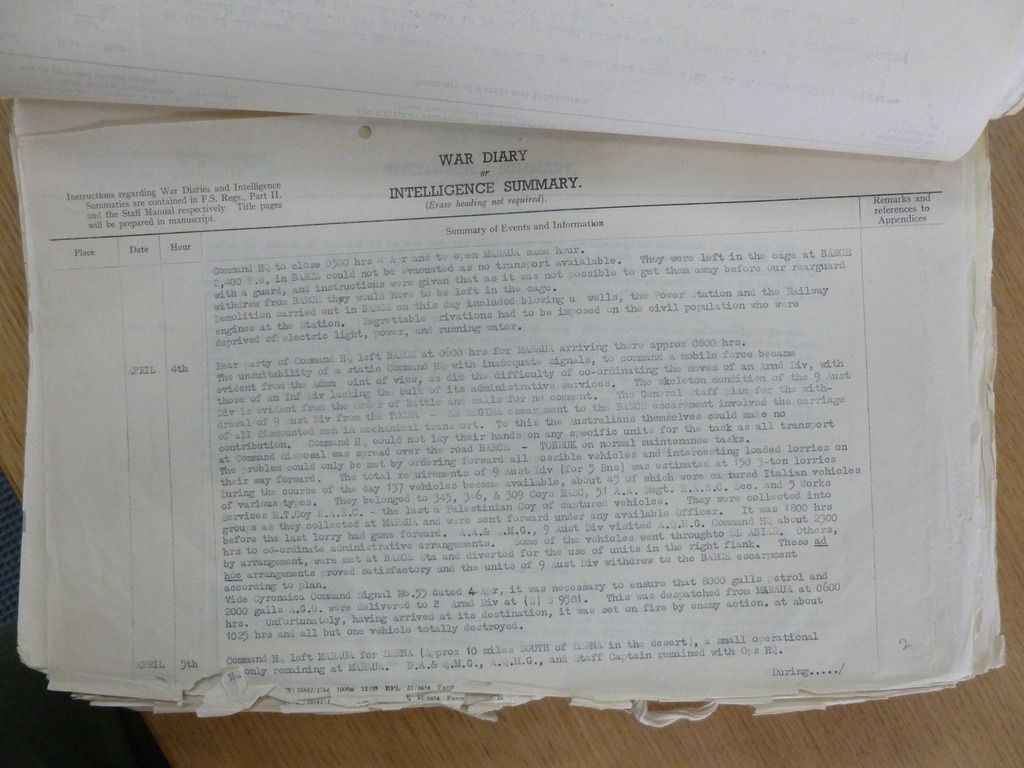
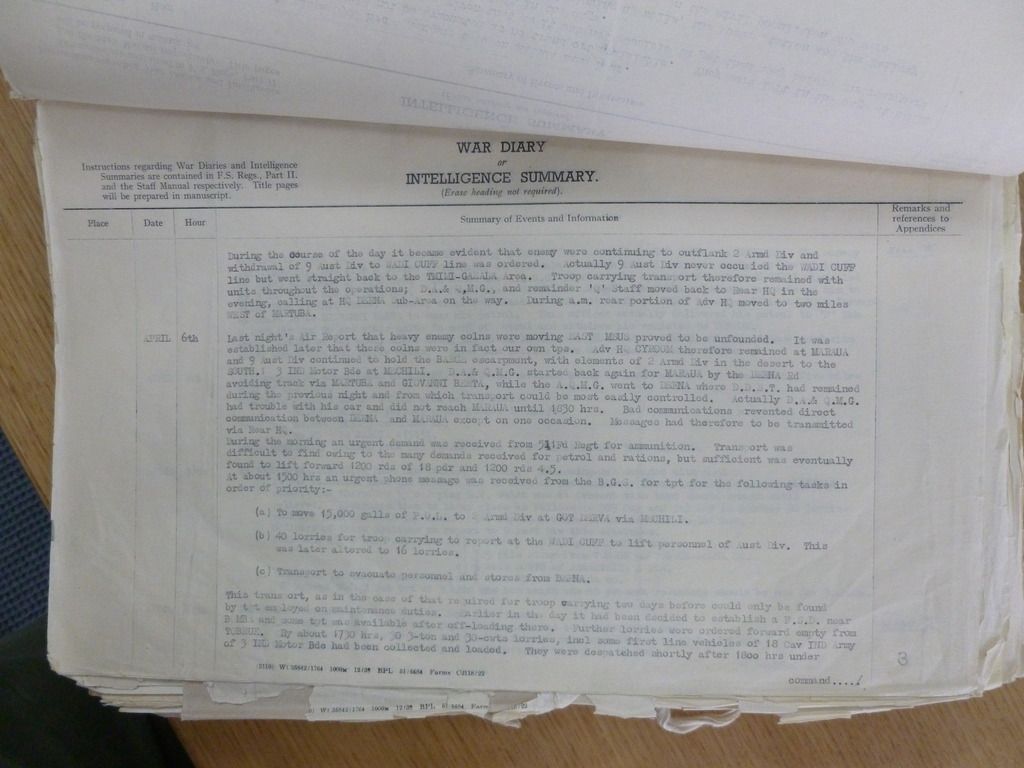
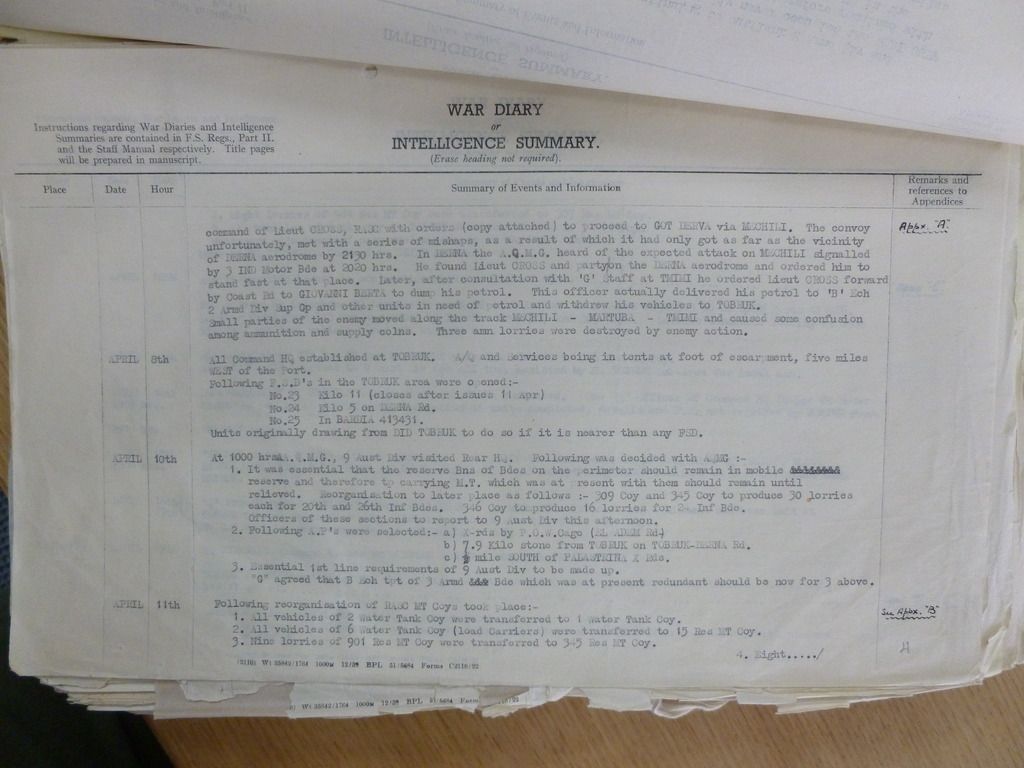
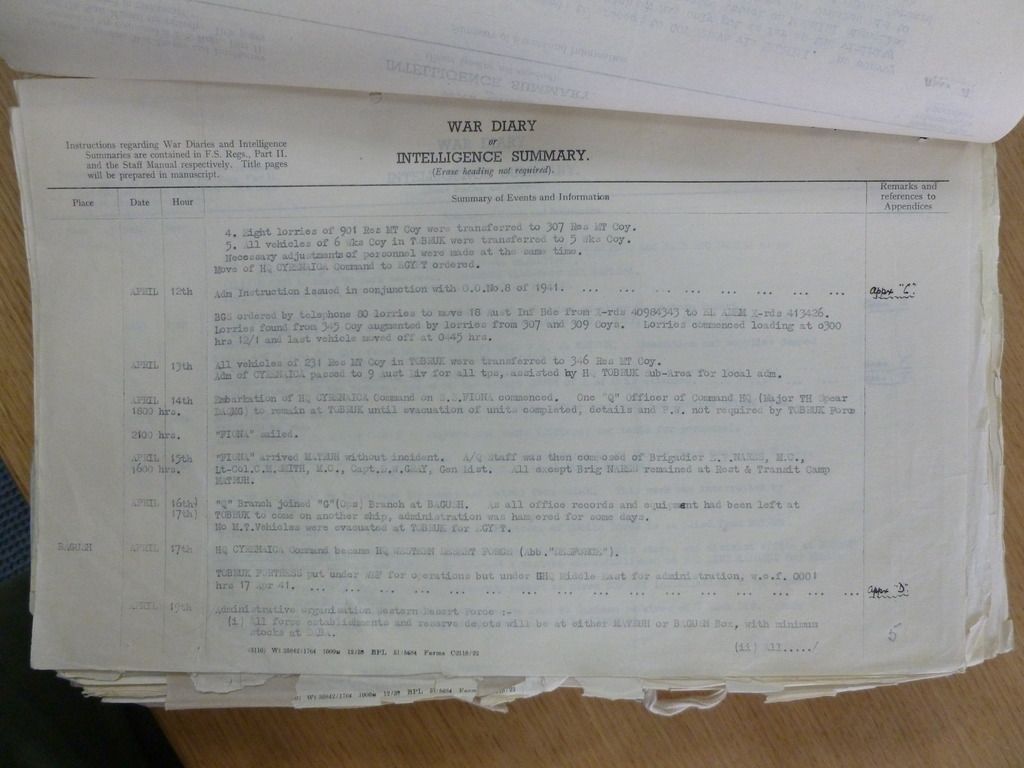
Anyway, the following Field Sources (all pages from WO 169/1243) are interesting (well I would say that) in that they show the Australians destroying their own dump at Magrun a full day early and then those affected were rescued by the RASC's ad hoc dumping at Ghemines. The RASC then go on to ad-hoc dump and continue to servce other dumps and lift troops such as the rescue of 2/13th Bn at Er Regima. The Aussies were so lucky the British rescued them which of course is a total reversal of the James Mason story.
The pages below go against the bs we get from Wavell trying to placate Churchill and the Cabinet by using words like disaster. It also shows CYRCOM's AQ continuing to operate as expected in combat conditions despite being subject to air attacks and some intermittent W/T problems. The pages do not include panic or collapse despite the Aussies' hurry/confusion. Also note towards the end that CYRCOM HQ becomes the reformed WDF and so its staff are not destroyed in the desert and neither was the eventually tank-less 3rd Armd Bde or the 2nd Sp Gp (until closed down by GHQ).
Another point is that the RASC were working as they had planned to do from the late 1920s and their methods were RASC developed from Field experience servicing the Empire and various emergencies (e.g. Shanghai) to support other units and they pre-date O'Connor and his attack on the X Armata. This is covered in their four inch thick Corps history which is a fascinating read for background.
And another point is that with these RASC troops and their organisation the divisions of CYRCOM could have retreated to Mersa Matruh to fight the main battle there.
And a final point is that they (Lavarack and Harding) felt that they did not need to fall back towards Mersa Matruh from Tobruk because Tobruk was already far enough to have given Rommel a difficult run to be followed by damaging concentrations of artillery which is what he got. Not only did they think they could hold Tobruk but they did. Why were they so confident? And Gott took over elements of 2nd Sp Gp outside Tobruk supported by the RASC to fall back to the border and fight there.
Mark if you have some Cabinet prepared wibble please tie it up outside.